Installing WireGuard VPN on Ubuntu 22.04
INSTALLING WIREGUARD VPN ON UBUNTU 22.04
Oracle Cloud VPS – 10 clients – VPN network 172.99.0.0/24
1. Architecture Information
· VPS Public IP:
· WireGuard interface: wg0
· VPN network: 172.99.0.0/24
· VPN server IP: 172.99.0.1
· Client 1 → Client 10: 172.99.0.2 → 172.99.0.11
· WireGuard UDP port: 51820
· VPS Internet interface: ens3
·
2. Install WireGuard
sudo apt update
sudo apt install -y wireguard qrencode
3. Generate Server Keys
sudo -i
mkdir -p /etc/wireguard
chmod 700 /etc/wireguard

wg genkey | tee /etc/wireguard/server_private.key | wg pubkey > /etc/wireguard/server_public.key
chmod 600 /etc/wireguard/server_private.key

# 4. Generate Keys for 10 Clients

for i in {1..10}; do
    wg genkey | tee /etc/wireguard/client${i}_private.key | wg pubkey > /etc/wireguard/client${i}_public.key
    chmod 600 /etc/wireguard/client${i}_private.key
done
5. Configure wg0
nano /etc/wireguard/wg0.conf
The server configuration should contain an interface section similar to:
[Interface]
Address = 172.99.0.1/24
ListenPort = 51820
PrivateKey = SERVER_PRIVATE_KEY
Each client has a separate peer, for example, client 1:
[Peer]
PublicKey = CLIENT1_PUBLIC_KEY
AllowedIPs = 172.99.0.2/32
Client 2 uses 172.99.0.3/32, continuing to client 10 using 172.99.0.11/32.
6. Start WireGuard
systemctl enable —now wg-quick@wg0
systemctl status wg-quick@wg0
wg show
7. Open UDP 51820 in firewalld
firewall-cmd —zone=public —add-port=51820/udp —permanent
firewall-cmd —reload
firewall-cmd —zone=public —list-all
8. Enable IP Forwarding
sysctl -w net.ipv4.ip_forward=1
echo ‘net.ipv4.ip_forward=1’ > /etc/sysctl.d/99-wireguard.conf
sysctl —system
sysctl net.ipv4.ip_forward
Expected result: net.ipv4.ip_forward = 1.
9. Enable NAT/Masquerade
firewall-cmd —zone=public —add-masquerade —permanent
firewall-cmd —reload
firewall-cmd —zone=public —query-masquerade
Expected result: yes.
10. Assign Interfaces to the Firewall Zone
firewall-cmd —zone=public —add-interface=wg0 —permanent
firewall-cmd —zone=public —add-interface=ens3 —permanent
firewall-cmd —reload
firewall-cmd —get-active-zones
Note: After successful configuration, ens3 and wg0 are both in the public zone; this zone has forward=yes and masquerade=yes.
11. Create Client Configuration
SERVER_PUBLIC=$(cat /etc/wireguard/server_public.key)

for i in {1..10}; do
    IP=$((i+1))

    cat > /etc/wireguard/client${i}.conf <<EOF
[Interface]
PrivateKey = $(cat /etc/wireguard/client${i}_private.key)
Address = 172.99.0.${IP}/24
DNS = 1.1.1.1

[Peer]
PublicKey = ${SERVER_PUBLIC}
Endpoint = 161.33.79.110:51820
AllowedIPs = 0.0.0.0/0
PersistentKeepalive = 25
EOF

    chmod 600 /etc/wireguard/client${i}.conf
done
12. Create QR Codes for Clients
qrencode -t ansiutf8 < /etc/wireguard/client1.conf
Scan the QR code using the WireGuard application on the phone. Client 2 uses client2.conf, continuing accordingly through client10.conf.
Note: Each device should have its own key and IP address. Two devices should not share the same QR/profile if they connect simultaneously.
13. Check VPN Status
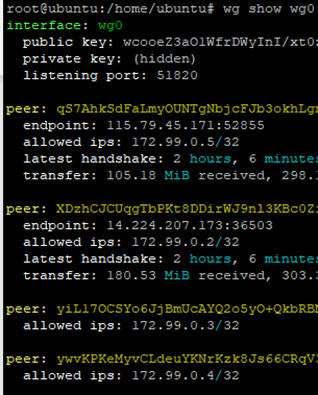
wg show
wg show wg0 latest-handshakes
When a client connects successfully, the corresponding peer will have a latest handshake and transfer statistics.
14. Monitor in Real Time
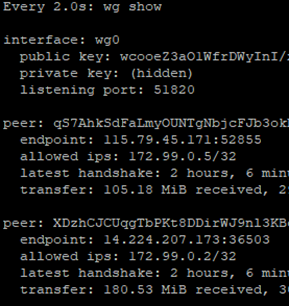
watch -n 2 wg show
.
Note: Do not share private key files. Only public keys are used to define peers; private keys must be kept secret on their respective devices.